Getting Started With Django And It's Anatomy (Part 1)

What is Django
Django is a matured Python batteries-included web framework and it's been battle tested over the years with even most popular service you most likely must have used before or the one you still use everyday. To mention a few of them are Spotify, Bitbucket, Robinhood, Instagram, Coursera, Udemy and many more.
What will be covering:
- Django's Anatomy
- Python Installation
- Setting Up Virtual Environment
- Installing Django
- Setting Up a Django Project
- Summary
- Conclusion
Django's Anatomy
Like every batteries-included framework Django uses the Models->Views->Urls->Templates pattern for structure. I'll briefly explain how this all come together.
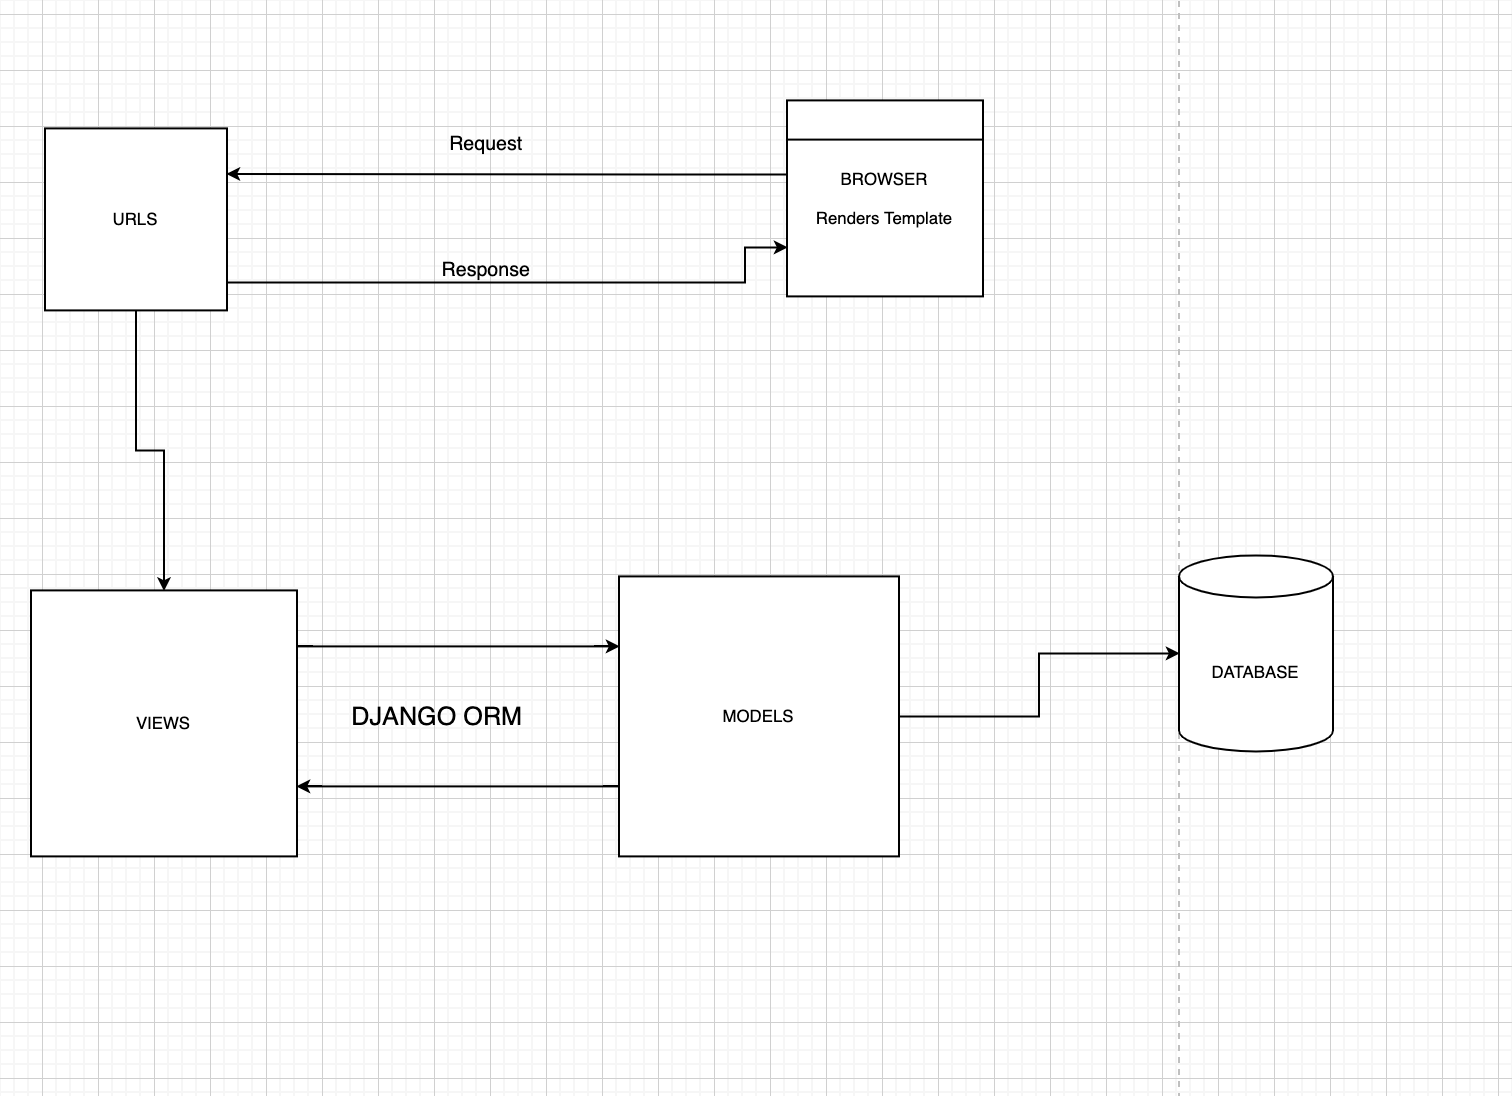
Models (models.py) It's responsible for modeling the table and its fields in a database
Views (views.py) It's were the business logic resides and processing of data retrieved from the database, writing of new ones, computing data to be sent to a template.
Urls (urls.py) It's contains urls mapping to views that will process the data expected to be rendered on registered urls.
Templates is responsible for the HTML which the browser renders in response to various requested urls.
Python Installation.
You need to download Python for your particular operating system follow the installation wizard and you should be all set.
To confirm if Python as been installed successfully, open up terminal or command line (Windows Users) type
python --version respectively. You should see something like this Python 3.7.6.Your version might be different by the time you are reading this. This just proves that there is Python available on your machine.
Setting Up Virtual Environment
A virtual environment is a tool that helps to keep dependencies required by different projects separate by creating isolated Python virtual environments for them. There are different types of virtual environments but i'll be using one called Pipenv. Pipenv is just my personal preference, you can always lookup another and use in place of Pipenv, as all you will be discusing in this post will also work with other types of virtual environment.
Install Pipenv
Installation is quite straight forward, with Python whose installation steps was shown earlier, it also installs a tool called pip which is use for installing python packages from PyPi which is a package registry in the Python ecosystem. Run this pip install pipenv to install Pipenv on your machine.
Now the system requirement to write a Django application is now ready. Let's get into setting up Django
Using Virtual Environment is optional, but it is the recommended way to setup your project
Installing Django
As mentioned earlier about virtual environment, hence you need to setup a virtual environment for our Django project
Run
mkdir django-sample-app && cd django-sample-app. This will create a new directory for the project called django-sample-app and change to the directory.Run
pipenv shellto initiate the virtual environment with pipenv. This will create an isolated environment for the dependencies of our project.Hence, you will be installing our dependency Django with
pipenv install djangoat the time of this writing the current version of Django at3.1.
Setting Up A Django Project
To setup a Django project, you need to run a Django command
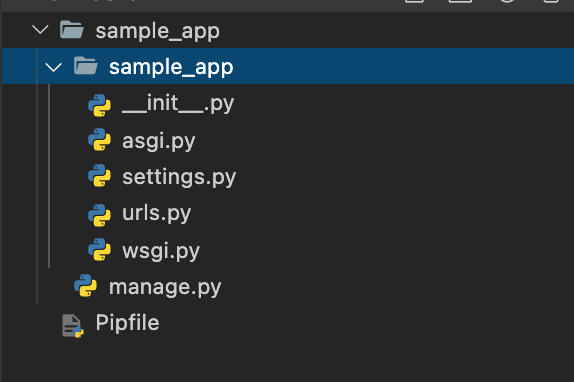
django-admin startproject sample-app. Your file structure should look like this
You now have a Django project setup, let's take a moment to explain what is going on with all the commands you've been typing.
The Django command django-admin starproject sample-app does exactly what you're thinking, it create a new Django project with the name sample-app. Let's discuss what the generated files from the earlier command do.
asgi.pythis file container setup for development asynchronous server setup for Django to work in asynchronously which still instill in it's early stage.settings.pythis file contains all the basic configuration to have your Django app running which is very extendable and highly configurable to your project requirements.urls.pythis file contains the url mapping to different business logic.wsgi.pythis file contains setup for development synchronous server setup for Django.manage.pythis file contains the wiring up of all the basic setup to ensure Django is installed and it runs.
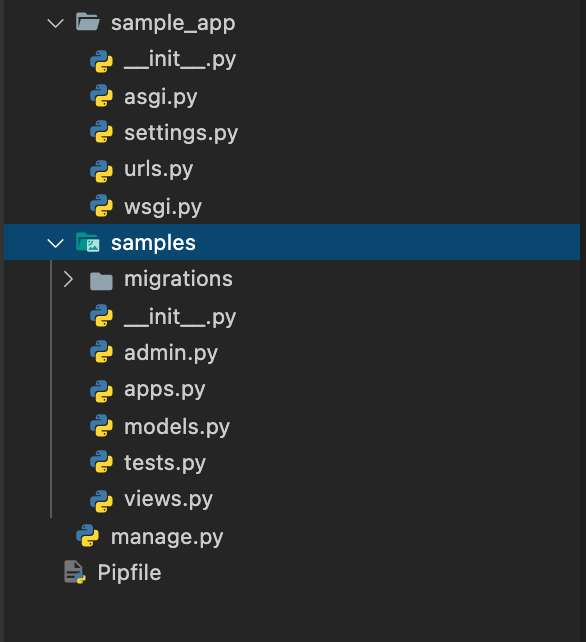
With Django there is a concept of apps which is a directory, and it contains specific business logic (if you may). Hence, Django can have multiple apps in one project. To create an app run python manage.py startapp <app_name>. We will be creating an app called samples python manage.py startapp samples. Your file structure should look this
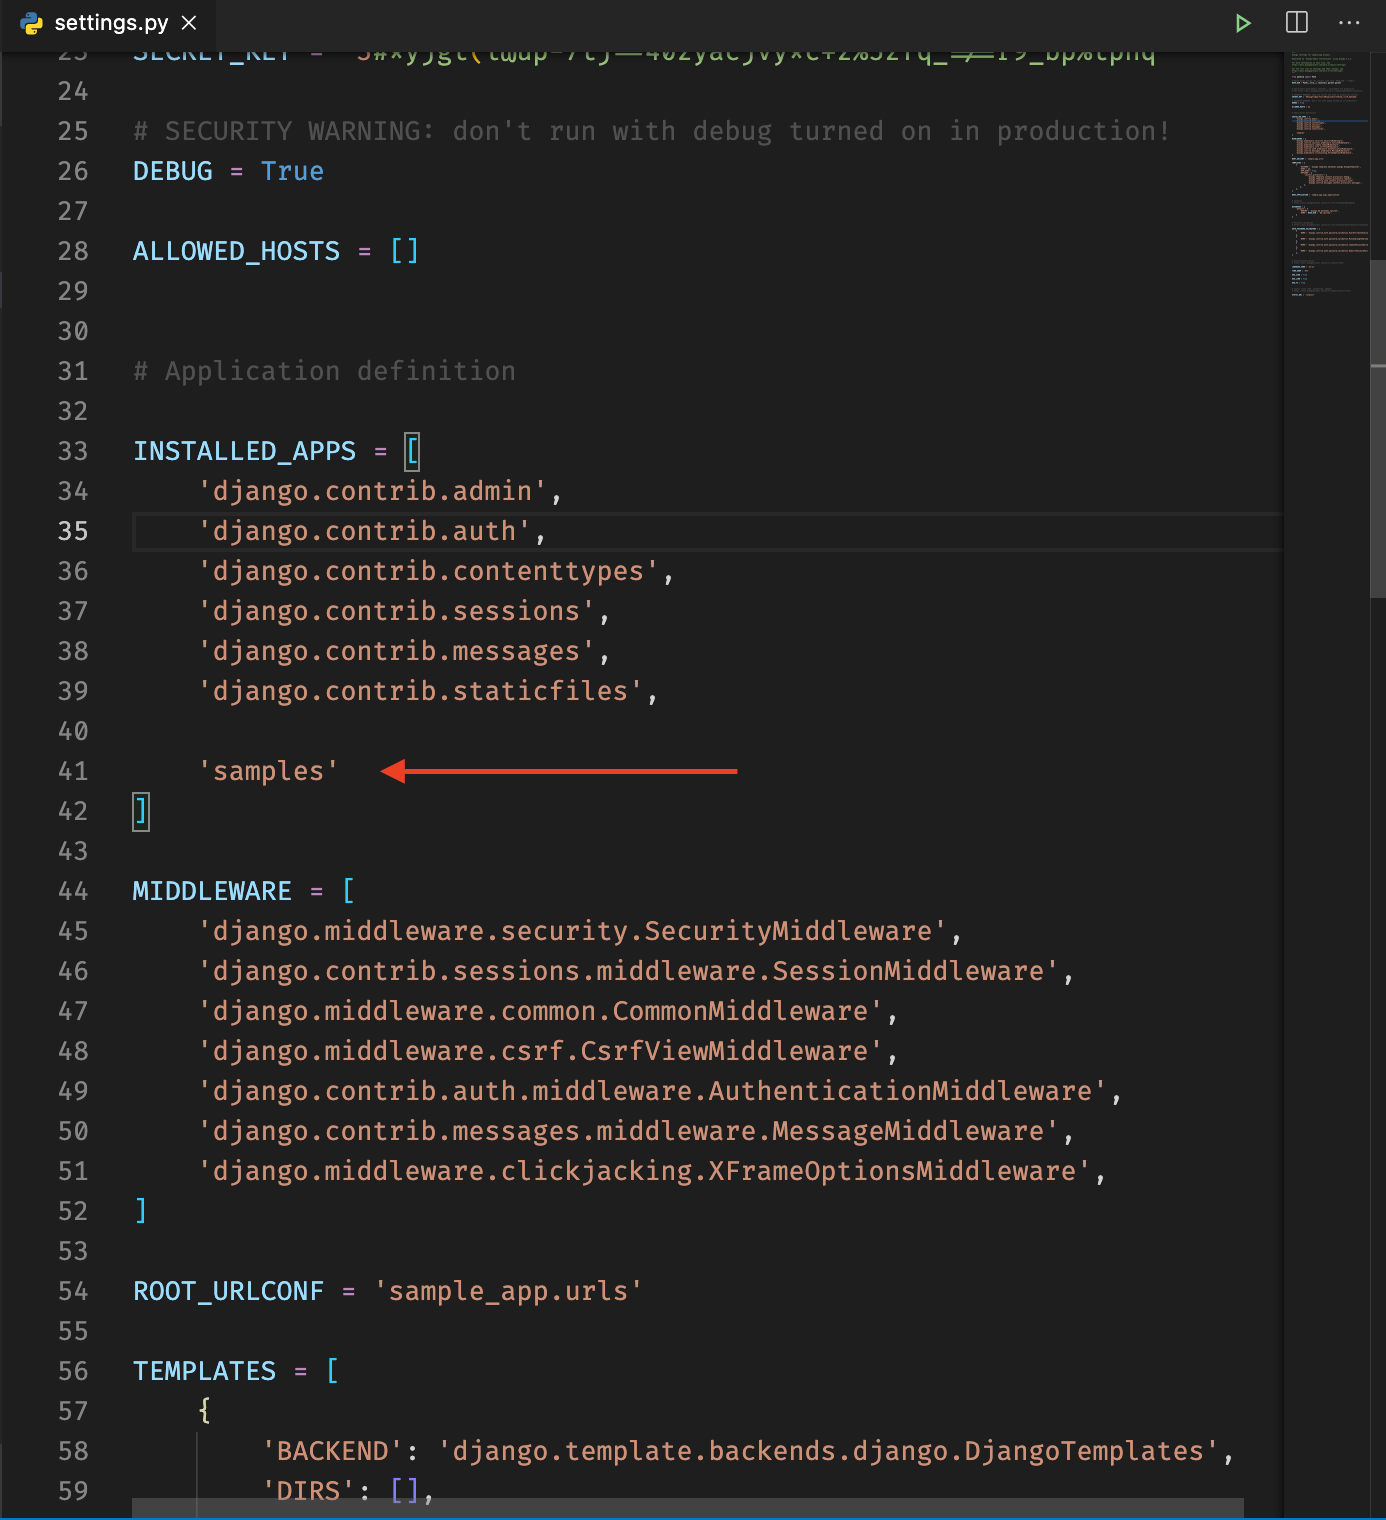
Next you will need to open our settings.py file to install the just created app samples. Scroll to INSTALLED_APPS this is a list of strings where the strings are apps names pertaining to the a project, which includes both Django batteries apps and others that will be created in the project; after adding the new app samples it should look like this
Phewww...... Are we there yet?
Almost..., let's see what it looks like on the browser after all aren't we trying to create a web application ):
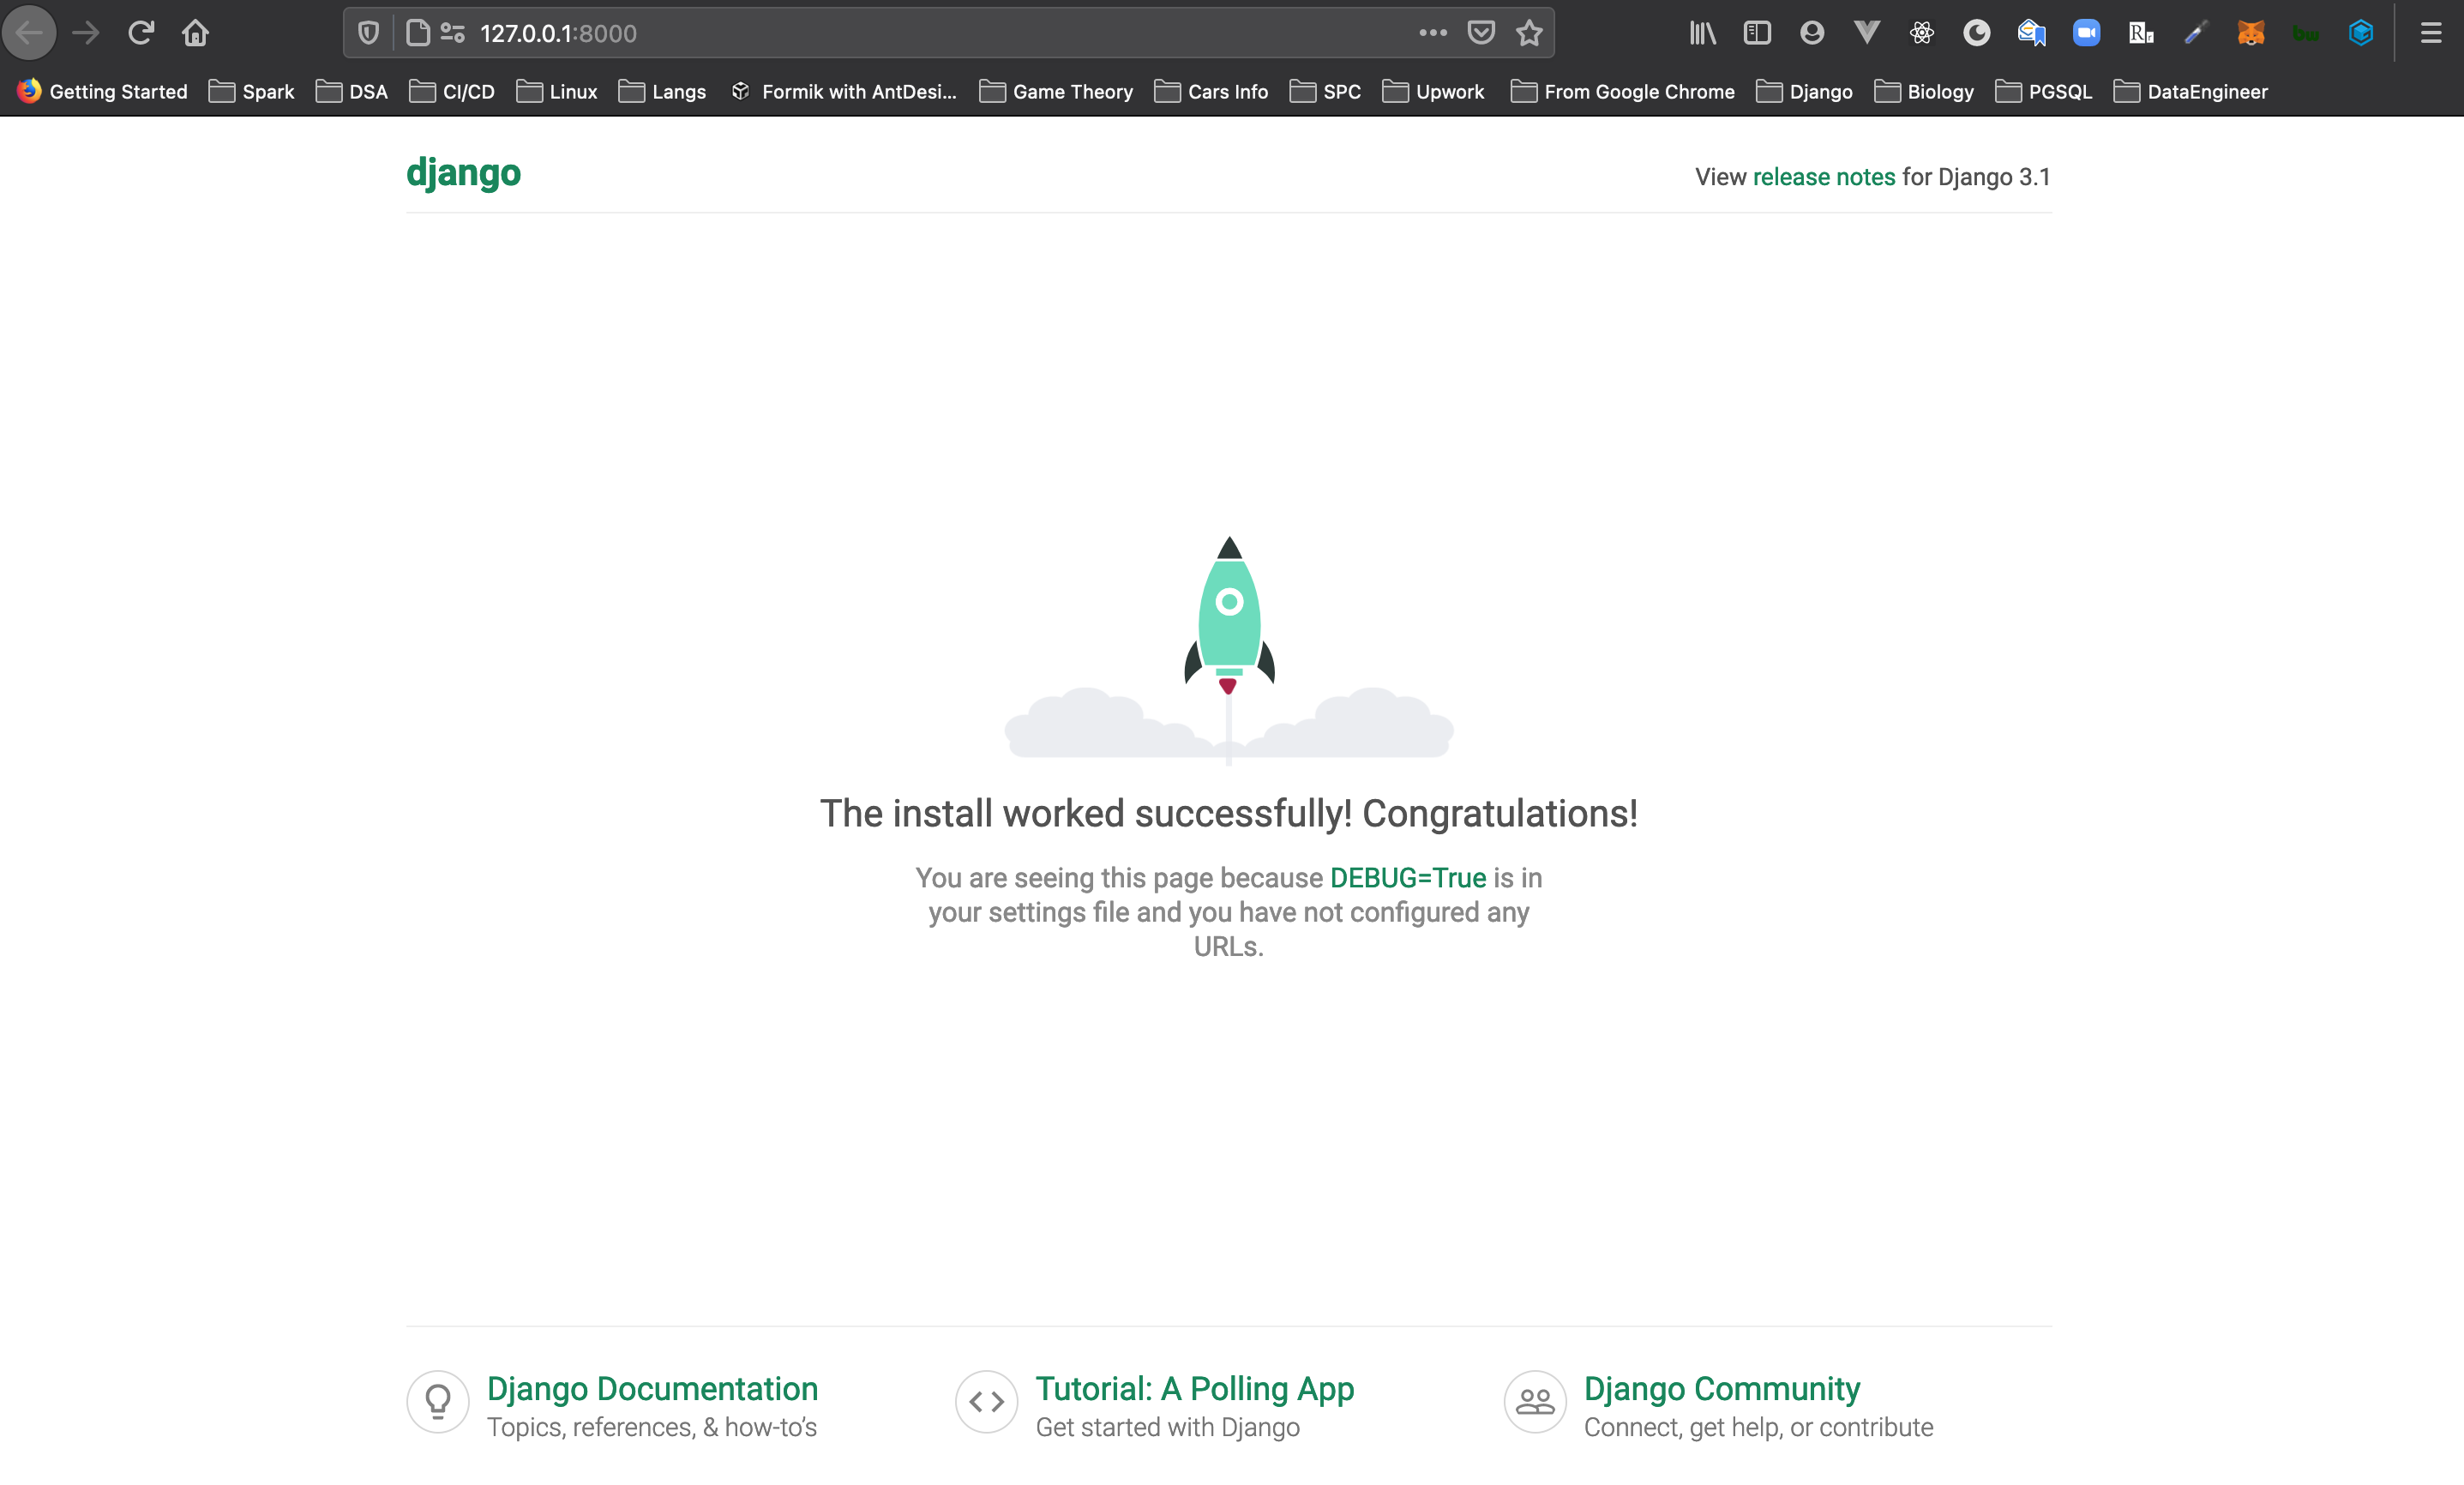
To run the application you would run python manage.py runserver it will start up the wsgi development sever and will be running on 127.0.0.1:8000. Open this url on your browser and you should something like this
PS: you don't have to install a django app before you can run
python manage.py runserverin a Django project.
Summary
pipenv shell - Creates virtual environment using Pipenv
pipenv install <package_name> - It install package using Pipenv
django-admin startprojects <project_name> generate a new django project with the specified name.
python manage.py startapp <app_name> generate a new app to be installed in settings with the app name.
python manage.py runserver start django developments server
Congratulations!!!, if you made it this far i say big thank you and i'm convinced you're interested in Django development, stay tuned for the Part 2. Happy Hacking!!!!
Reference:
Official Django Documentation https://docs.djangoproject.com/en/3.1/
https://realpython.com/pipenv-guide/
https://www.geeksforgeeks.org/python-virtual-environment/

